
A garage can look bright from the doorway and still hide the work that matters.
A screw rolls beneath the bench, a pencil line disappears at the saw, and a small oil spill blends into the concrete. Those are the moments when a single ceiling fixture proves it has lit the room, not the workshop.
Useful garage lighting reaches the bench surface, the machine table, shelving, and the floor around parked vehicles. Overhead light is the starting layer, but cabinets, open doors, a raised hood, and the worker’s own body can block it exactly where detail work happens. The aim is not a glowing ceiling. It is clear, even light at the task—with enough coverage to spot a dropped fastener, follow a cut line, and move safely without stepping into a shadow.
Build light in layers, not rows
A garage works best with three simple layers of light. Ambient light makes the room safely usable: it fills the open floor and provides a general view when the door is shut. Ceiling fixtures handle most of this job.
Task light is aimed where detailed work happens—over a bench, beside a drill press, or at a tool cabinet. A ceiling fixture behind the worker often casts their head and shoulders directly across the work, so a bench light placed forward of the work area is more useful than another bulb in the middle of the room.
Vertical light is optional, but valuable around shelves, pegboards, and vehicle sides. Wall-mounted or angled fixtures reveal labels, parts, and the lower side of a vehicle that overhead light misses.
A neat ceiling grid can still leave poor spots: under open garage doors, along wall benches, between a parked vehicle and shelving, and inside tall storage bays. Before buying more fixtures, mark the car footprint, bench positions, door swing, and storage walls on a simple sketch. Then place each layer for the surface that needs to be seen—not merely for an evenly bright ceiling.
Measure the room before buying lights
Start with a quick sketch: length, width, ceiling height, doors, windows, and anything that blocks or hangs below the ceiling. Mark the bench, machine tools, parking bays, tall shelving, and the spots used for close work such as wiring, sanding, or paint touch-ups. A two-car layout needs a different starting point from a storage-heavy garage; this guide to sizing output for a two-car garage helps put that difference into numbers.
Floor area sets the ambient-light target, but the activity sets the useful brightness. Walking around, finding stored items, and parking generally need an even base level. Cutting a layout line or inspecting a finish needs stronger, better-aimed light at the surface—not simply more glare from overhead.
Note what reduces light
Allow extra capacity for real conditions rather than calculating from an empty, white room. Light is lost to:
- dark walls, open rafters, and unfinished ceilings that absorb rather than reflect light;
- fixtures blocked by a garage-door track, opener, shelves, or a raised vehicle;
- dirt on lenses and aging LEDs; and
- distance: a high fixture spreads light across a larger area before it reaches the floor.
Ceiling height deserves its own check. In a garage with a high ceiling, widely spaced fixtures can look bright when viewed upward while leaving the work plane dull. See how to keep floors bright under a 12-foot ceiling before settling on fixture spacing. Finally, identify where a person normally stands at each bench; that position reveals where overhead light will be blocked by shoulders and arms.
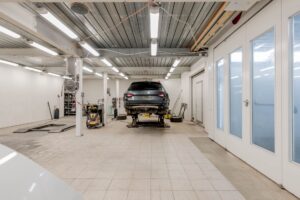
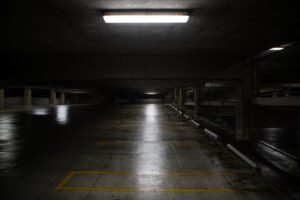

Map zones before laying out the rows
- Draw the garage as working rectangles
On a simple floor sketch, mark the parking bay, bench area, tool wall, assembly space, and paths to doors. Treat each as a zone with its own floor and surface-lighting needs rather than trying to light the room from one central point.
- Mark shadows before fixture positions
Add garage-door tracks, open door panels, beams, ceiling-mounted racks, and tall cabinets to the sketch. A fixture hidden behind a beam or storage bin may leave a surprisingly dark strip below, even when the rest of the ceiling looks bright.
- Set ambient rows across the usable ceiling
Place linear fixtures in two or more rows over the clear portions of the room, usually running along the longer dimension. Keep rows far enough from walls to light the edge of the floor, but not so far inward that shelving and benches fall into their own shadows.
- Make the light patterns overlap
Space fixtures so the bright spread from one row reaches into the next row’s coverage area. The goal is an even blend on the floor, not isolated pools of light with dim seams between them. Offset a fixture around an obstruction instead of accepting a gap.
- Check the layout at floor and wall level
Before drilling, temporarily hang or hold lights in position if possible. Look for dark areas beside a vehicle, under open door tracks, at the front edge of a bench, and on pegboard, shelf faces, and cabinet doors. Shift ambient fixtures first; add task or vertical lighting where a row cannot reach.
A ceiling layout can look balanced on paper yet fail at a bench if a raised door, rack, or beam blocks light from the working side.
With the garage door fully open, stand at the bench and along both sides of the parking bay. The door and its tracks often block the outer part of an otherwise sensible lighting row.
If opening the door creates a shadow band, move that fixture inward or add a separate fixture aimed at the affected wall or work surface. Avoid placing lights where the door could strike them.
Light the bench from the front
When a worker faces a bench, an overhead fixture positioned behind their shoulders throws their head, hands, and upper body across the surface. The result is a bright garage with a frustratingly dim cutting line, fastener, or wiring connector.
Add front-and-side light rather than simply increasing ceiling wattage. A slim LED bar or shop light mounted above the bench’s front edge, aimed back toward the wall, fills the shadow cast by the worker. A second fixture from one side makes hand shadows less severe and gives small parts more visible shape.
For flexible tasks, an adjustable arm lamp or pivoting LED work light can be aimed across—not straight down onto—the job. It is especially useful for sanding, marking out, and inspection. Keep cords clear of clamps and moving tools, and avoid placing a lamp where it can be struck by stock.
Under a shelf or upper cabinet, install a continuous LED strip or bar with a diffuser. This puts light close to the surface without occupying bench space; it also brightens drawers and the back edge of the worktop. For fixture positions, mounting height, and aiming details, follow a bench lighting layout designed to stop body shadows.
Choose light that suits the work
- Color that makes materials readable
For general garage work, neutral white around 4000–5000K usually makes small parts and markings easy to see without the harsh blue cast of some cool lamps. The right color temperature for a garage depends on whether the space is used for repairs, detailing, or relaxed hobby time.
PreferA consistent color temperature across nearby fixtures.SkipMixing warm and very cool lamps over one bench. - Color accuracy for finishes
Brightness cannot reveal a mismatched paint touch-up or a sanding scratch. For painting, stain, wiring colors, or finish inspection, fixtures with a CRI of 90 or higher are a worthwhile upgrade; see high-CRI options for spotting finish defects.
PreferHigh CRI where color decisions are made.SkipRelying on low-CRI utility lights for finishing work. - A soft, controlled beam
A bare, point-like LED can throw glare from glossy tools, car panels, and white benchtops. Diffused lenses, wider fixtures, and placement just outside the usual sightline keep the surface bright without making the lamp itself uncomfortable to face.
PreferDiffused light aimed across, not into, the eyes.SkipExposed emitters directly above the work position. - Ratings for the actual garage
An unheated garage needs fixtures rated to start at local winter temperatures, not merely indoor-use lights; cold-weather shop-light choices explain what to check. Around sawdust and airborne debris, sealed housings are easier to clean and more dependable—consider lights built for dusty woodworking spaces.
PreferDocumented cold-start and dust-protection ratings.SkipAssuming any LED fixture tolerates cold or fine dust.


Plan the power before adding fixtures
A bright layout still needs a power plan. Plug-in LED fixtures suit a first upgrade: they are quick to hang, easy to reposition, and useful where ceiling wiring is absent. Each fixture needs a properly grounded outlet within reach; extension cords and outlet strips are not a permanent ceiling-lighting system.
Before adding a row of lights, identify the breaker that serves the garage and what else runs on it—chargers, a refrigerator, a compressor, or power tools. Add the fixture wattages, then check how much lighting a 15-amp circuit can reasonably carry. The circuit’s voltage-and-amp rating is a limit, not a target to fill.
Hardwired fixtures create a cleaner, switch-controlled installation and make sense for a settled layout. They also require suitable boxes, cable routing, grounding, and a switch arrangement that is safe at the entry. For an unfamiliar circuit or a new branch circuit, follow the essentials of a hardwired shop-light installation and have a qualified electrician handle uncertain wiring work.
Existing fluorescent housings may offer a third route. Some LED replacement tubes work with the existing ballast; others require ballast bypass or a new fixture. Check the tube and housing instructions carefully before attempting to update fluorescent shop lights to LED safely. Local electrical rules and permit requirements can apply, especially to altered permanent wiring.
A breaker that has not tripped is not proof that a circuit is correctly loaded or wired. Stop and call an electrician if outlets feel warm, breakers trip, wiring is damaged, or circuit routing is unclear.


Test the workshop under normal conditions
- Put the garage back into service
Park vehicles, close and open the door, return tall shelving, and place common tools where they normally live. An empty garage can make a layout look far better than it performs.
- Walk each work zone at the usual times
Check the bench, tool wall, doorway, and vehicle sides after dark and during the daylight conditions when projects actually happen. Look for hand shadows, dark shelf faces, and harsh reflections on metal or painted panels.
- Correct the smallest problem first
Move a poorly aimed fixture before buying more light. If the shadow stays, add a focused task lamp, increase output only in that zone, or diffuse a bare source that causes glare.
- Test lights with real tasks
Read a tape measure, find a socket label, inspect a fastener, and work under an open hood. These simple jobs reveal whether the light reaches the surface rather than merely brightening the floor.
- Set controls for the work pattern
A sensor can be useful for entry and cleanup, especially when choosing motion-activated shop lights that avoid needless run time. Keep bench and repair lighting on a manual, dependable switch so it cannot switch off during still, detailed work.
Recheck after a few projects; parked vehicles and seasonal daylight often expose issues missed on installation day.
If a bright fixture reflects in a windshield, glossy cabinet, or tool surface, aim it away from the sightline or add a diffuser. More output rarely fixes glare; better placement usually does.
A Brighter Garage Starts With One Better Zone
- Fix shadows at the primary bench or machine before adding fixtures to already adequate open floor.
- Aim for useful overlap at work height, not an even-looking pattern on the ceiling.
- Treat glare as a placement problem: shift, diffuse, or redirect the fixture before buying more output.
Start with the area used most: usually the main bench, a machine station, or the vehicle work bay. Test it during ordinary tasks, then add or reposition a light where hands, tools, or the body create a shadow. That small improvement often changes how usable the whole workshop feels.
Complete coverage comes from three parts working together: ambient light for general visibility, overlapping directions that prevent dark seams, and task light placed close to demanding work. A garage does not need every surface equally bright; it needs the important surfaces reliably visible without harsh glare.
